
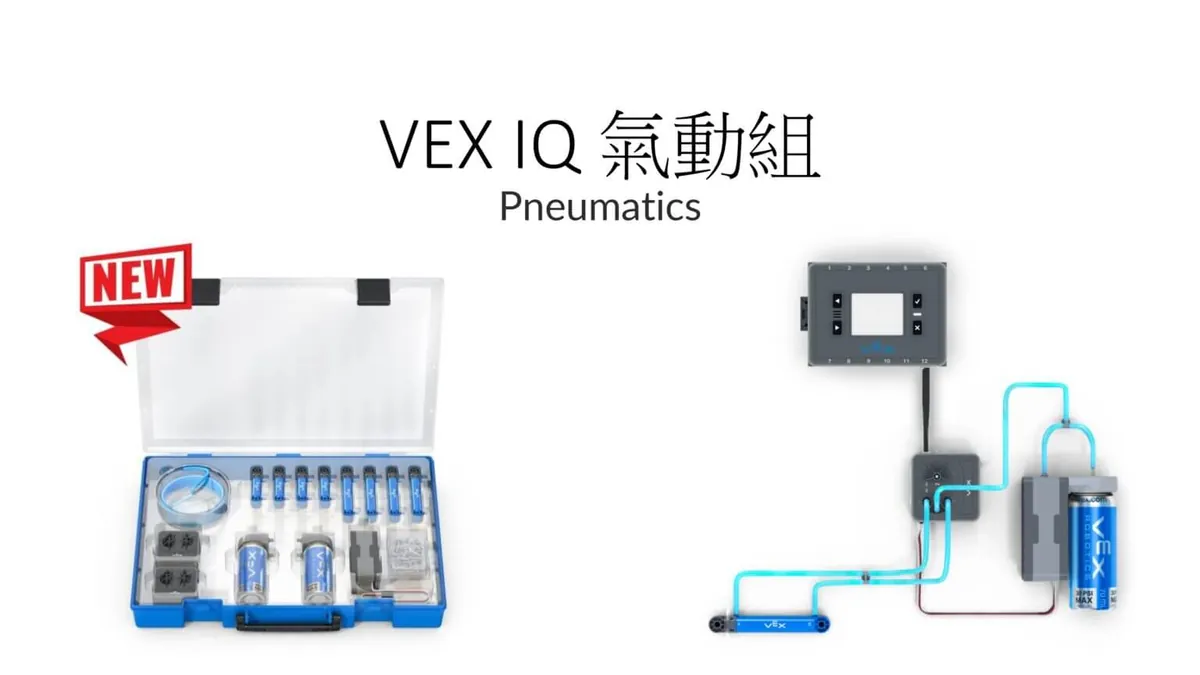
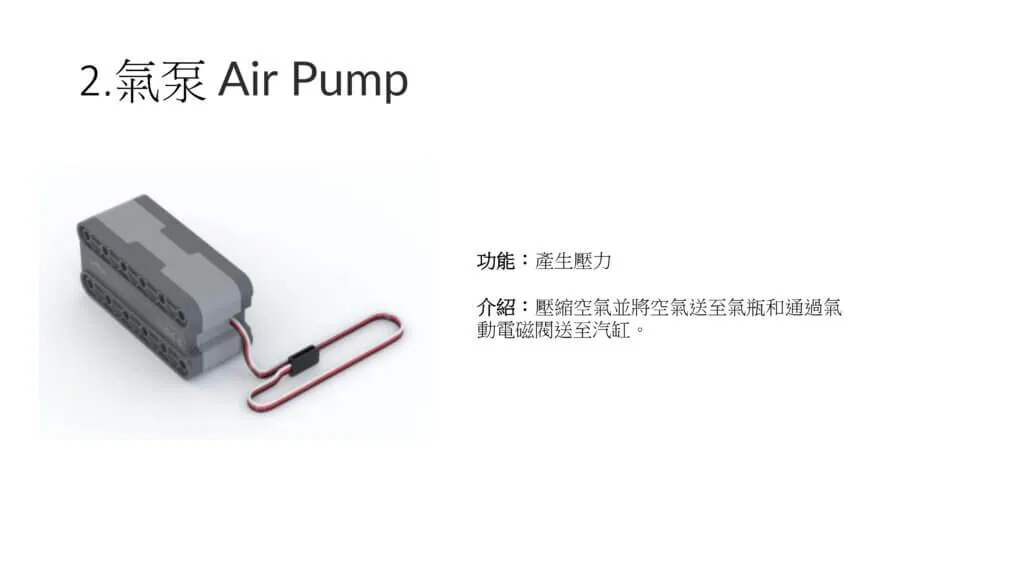
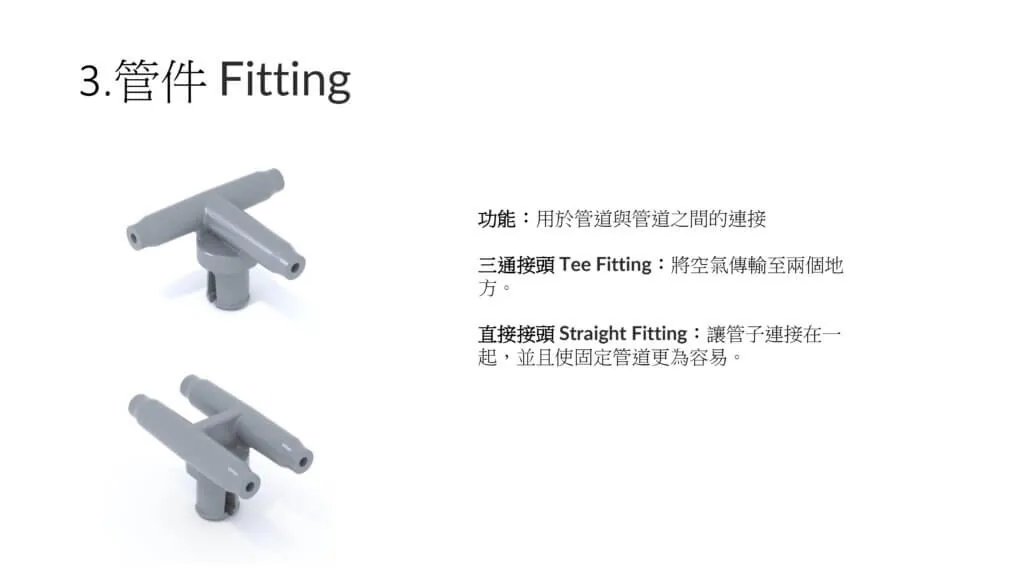
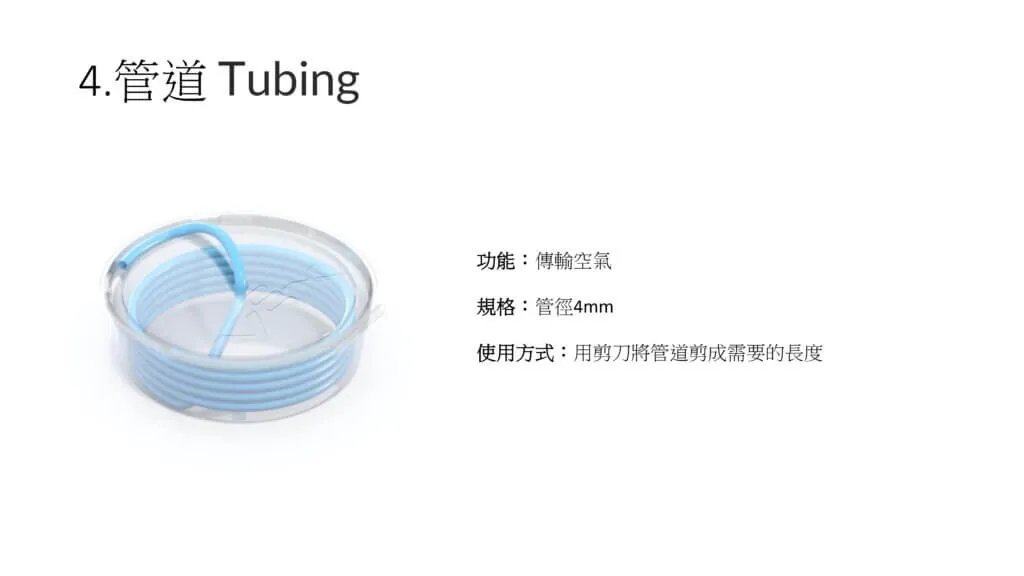
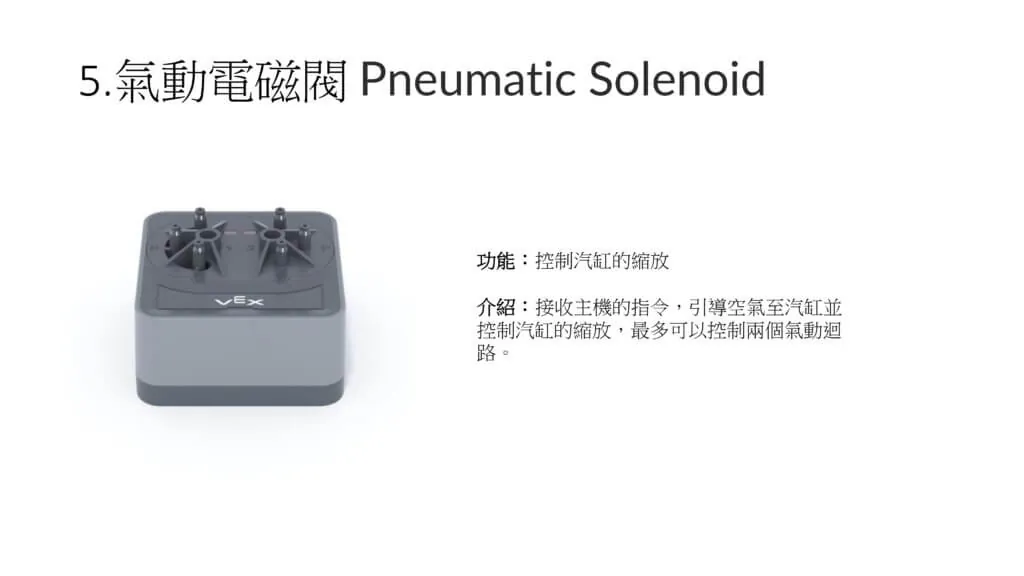
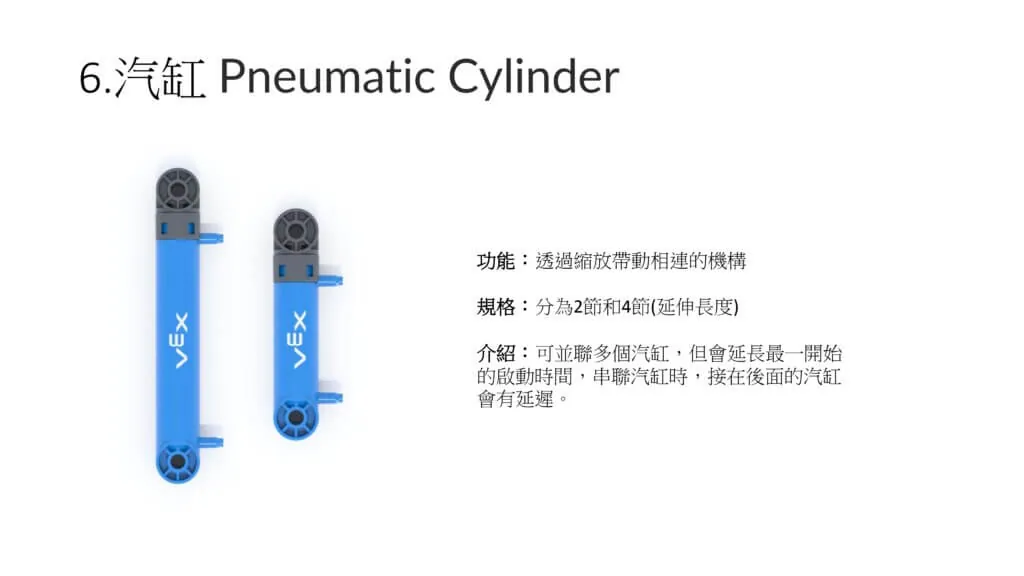
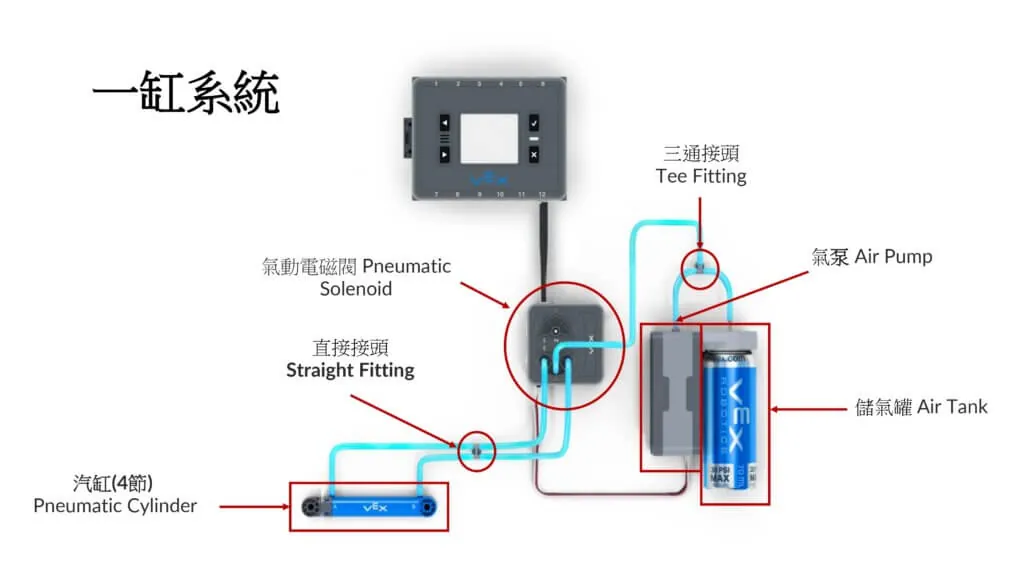
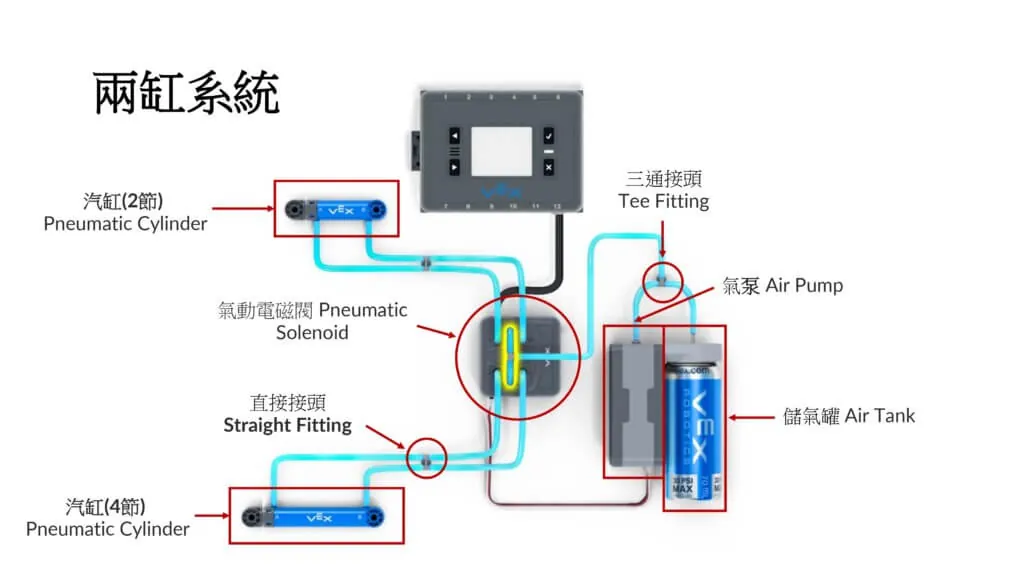
Next, let's look at example configurations for the pneumatics kit. There are two types: using just one cylinder is called a single-cylinder system, and using more than one is called a two-cylinder system.
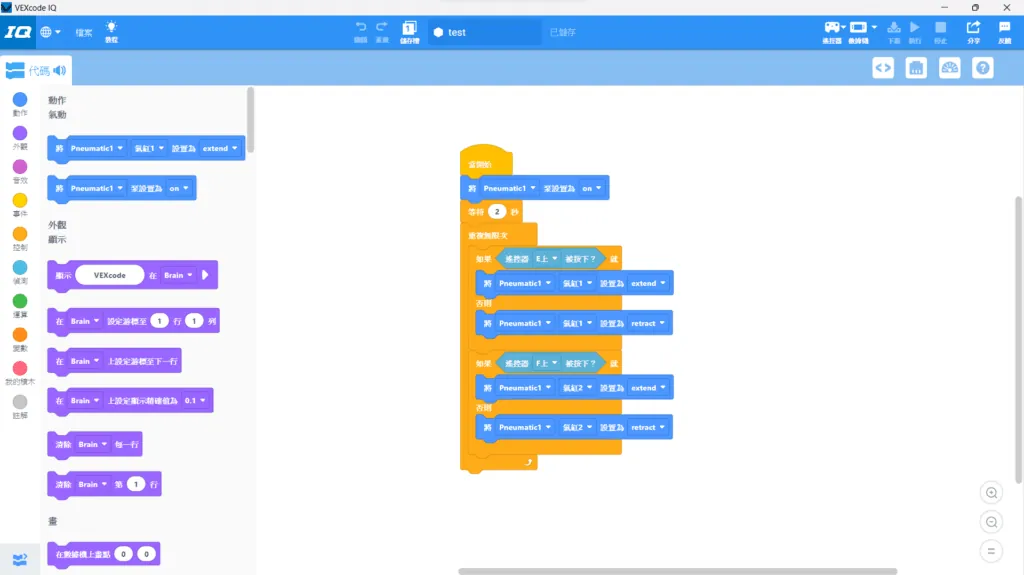
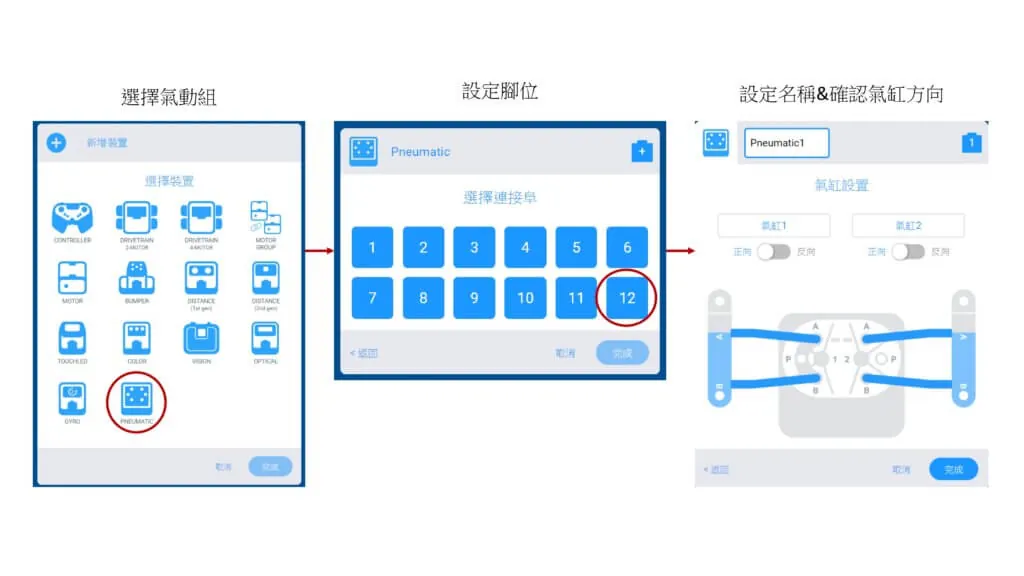
Finally, here is how to control the pneumatics kit with VEXcode IQ.
First, add the pneumatics kit to your devices. Note that if the cylinder direction is the opposite of the direction you set up, the program will run in reverse too.
Next, write the program. The pneumatics kit has only two blocks: one turns the pump on and off, and the other extends and retracts the cylinder.
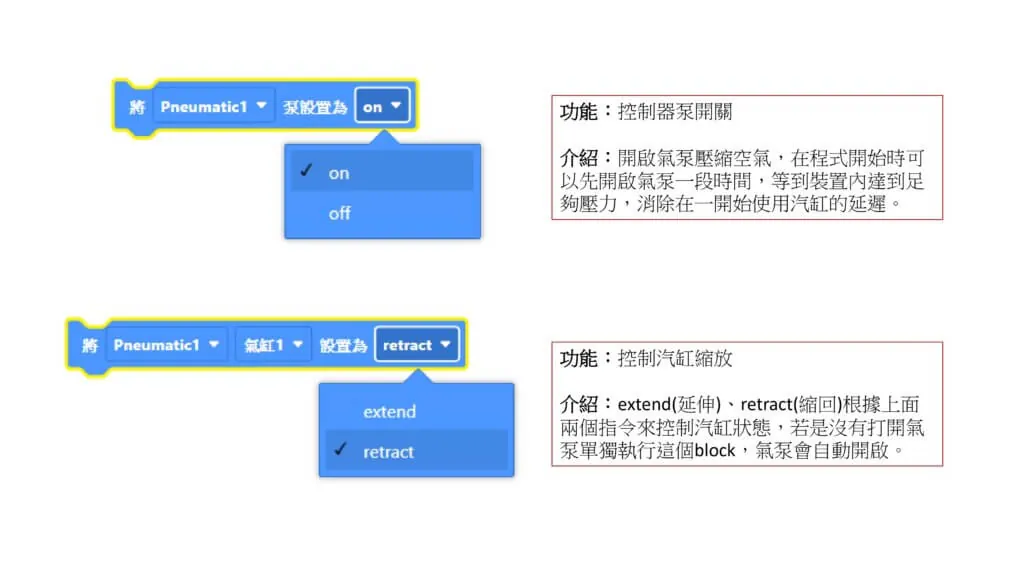
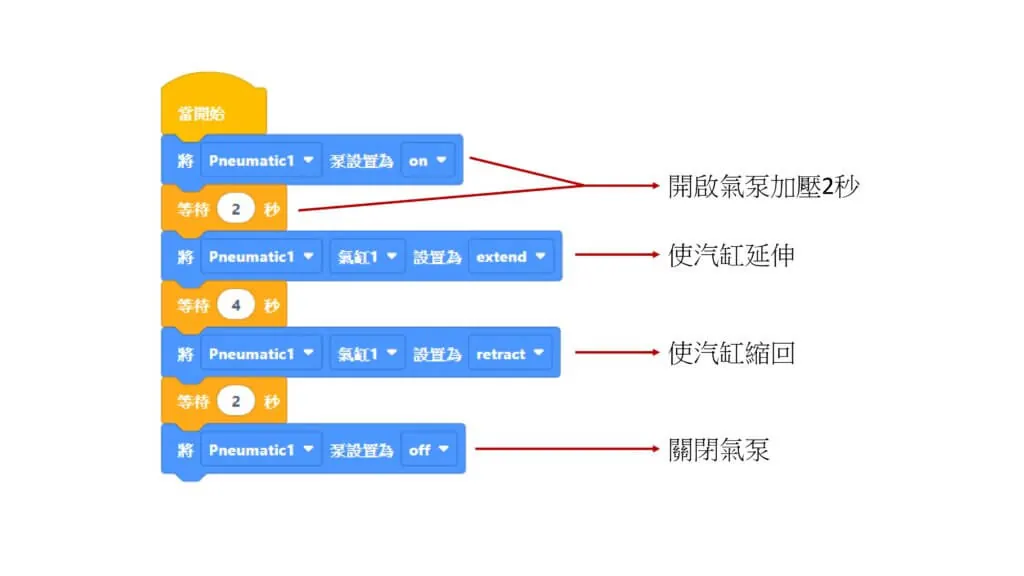
At the start of the program, turn on the pump to pressurize the system. Then use the pneumatic solenoid to control the cylinder, and turn the pump off when you're done.
Below is a two-cylinder system operated with the joystick.